Blog — "food"
A Wood-Fired Pizza Feast in Indiana
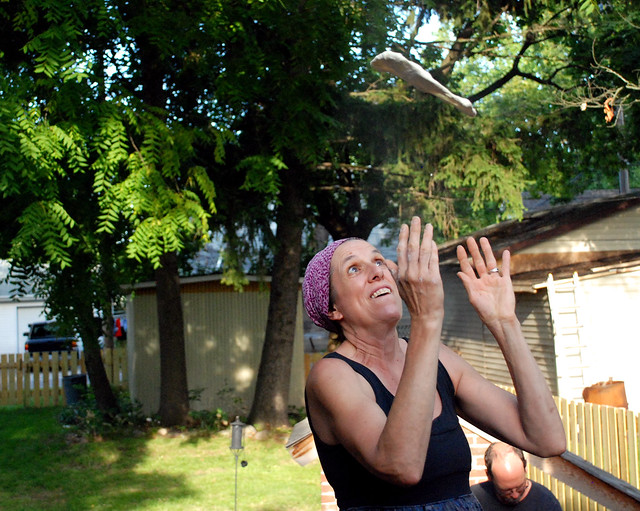
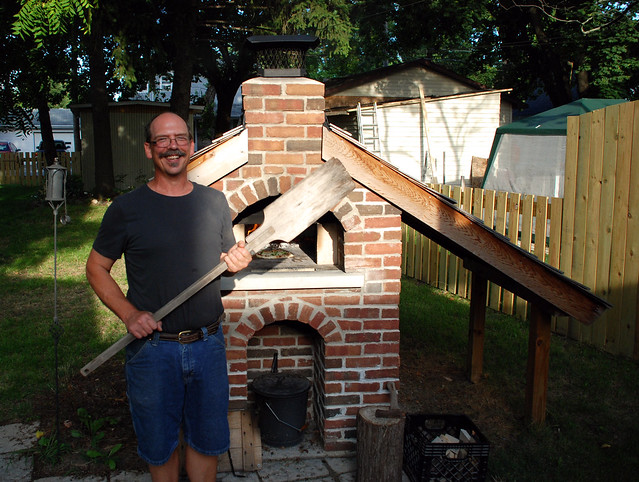
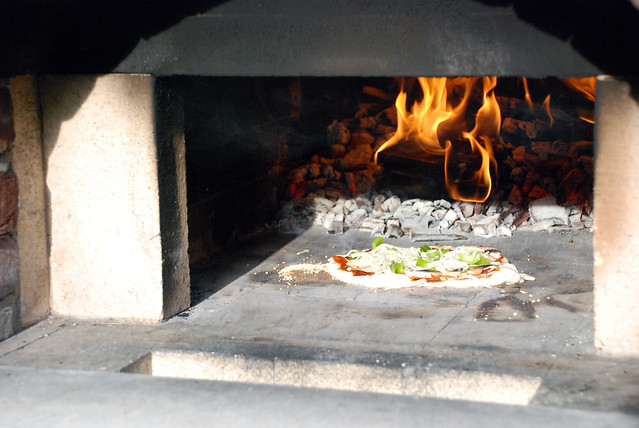
A visit with my parents in the summer now seems synonymous with relaxing time with good food. As you may know, my mom is a baker and uses a wood-fired oven that my dad built at her bakery for a large portion of the breads that she bakes. She also offers other delicious food items from time to time that are produced in her wood-fired oven. My parents loved the oven at the bakery so much, that my dad decided to build a second one in their back yard a couple years ago. This means that if the weather is nice, there is surely to be a wood-fired oven feast to be had while visiting.
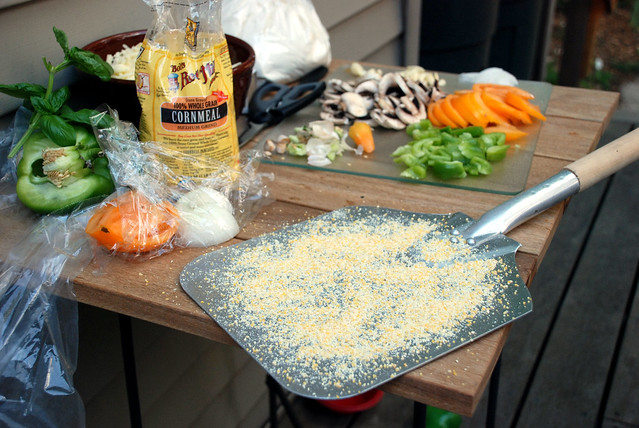
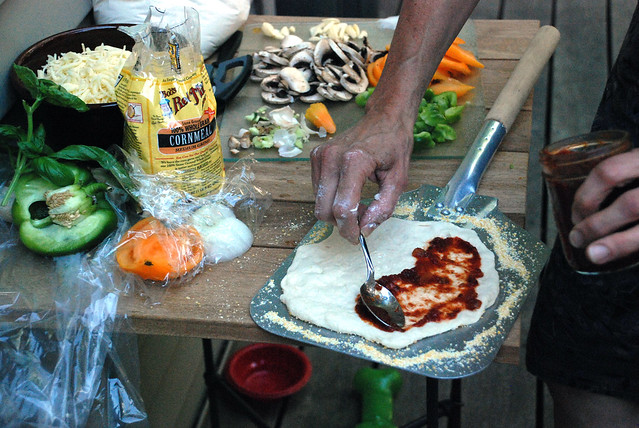
This time, we enjoyed wood-fired pizza and a fresh salad full of veggies from my mom's garden. My grandmother came to join us in our feast as well. To be honest, there is little that compares to food that comes out of a wood-fired oven-- the flavors are just amazing! It was nice to split up our drive west relaxing on the patio, meeting my parents' new dog Stella, seeing my grandmother, and eating amazing food.


 Food has always played an important role in my family, and this visit was no different. These sorts of visits are always something to look forward to.
After our quick, two night stay in Indiana, we hit the road again and made our way to South Dakota. Stay tuned for photos from the next part of our trip!
Santa Fe Black Bean Salad
Heidi Shenk "cuisine" "food" "recipe"

Santa Fe Black Bean Salad
2 15 ounce cans of back beans, drained
2 cups whole kernel corn
1 small onion, diced
4 garlic cloves, minced
2 tsp chili powder
1 tsp ground cumin
2 Tbsp lemon juice
2 Tbsp chopped cilantro
1 tsp salt
1 avocado, diced
1 tomato, diced
Combine and toss ingredients, adding avocado and tomato right before serving. Serve with tortilla chips.
This is one of the most simple, yet flavorful recipes that I've made. I absolutely love making this when we have barbeques or backyard parties in the summer. It is perfect for a quick snack as well. The flavors really set in even more so by the second day, so I often quickly make it the night before I plan on eating it.
Happy Hour at Home
Heidi Shenk "cuisine" "food" "Lilah"


What was your favorite part of the weekend?
Chocolate Layer Cake with Milk Chocolate Frosting
Heidi Shenk "cuisine" "food" "recipe"
I asked Andrew last week if there was anything in particular that he wanted to eat for dinner this week, and his response was just, "Desserts. You make the best desserts." So on a quest to come through for him, and with the excitement of getting back to what I'm truly the best at in the kitchen, I scoured the web for a new recipe to try. And what I found was the most delectable chocolate cake I think I've ever had. Mind you, it may be incredibly rich and take a bit of time to make, but in the end, I guarantee it is all worth it!


Ingredients for the Cake
- 2 cups all-purpose flour
- 2/3 cup unsweetened cocoa powder (not Dutch-process)
- 1 1/2 teaspoons baking soda
- 1/2 teaspoon salt
- 2 sticks (1 cup) unsalted butter, softened
- 1 cup packed dark brown sugar
- 3/4 cup granulated sugar
- 4 large eggs at room temperature for 30 minutes
- 2 oz unsweetened chocolate, melted and cooled
- 1 1/2 teaspoons vanilla
- 1 1/2 cups well-shaken buttermilk
- 2/3 cup whole milk
- 3 large egg yolks
- 1 tablespoon plus 1 teaspoon all-purpose flour
- 1 1/3 cups confectioners sugar
- 1 teaspoon vanilla
- 3 sticks (1 1/2 cups) unsalted butter, cut into tablespoon pieces and softened
- 8 oz milk chocolate, melted and cooled (I used a little under 2 Lindt milk chocolate bars)
- 2 oz unsweetened chocolate, melted and cooled
Directions for the Cake
Pre-heat the oven to 350. In a stand-up mixer, cream sugars and butter until nice and fluffy. Beat in eggs one at a time. Incorporate chocolate and vanilla until smooth. Combine flour, cocoa, baking soda, and salt in a separate bowl. Mix in flour mixture and buttermilk alternately. Pour the batter into 2 greased, round cake pans and bake 25-35 minutes or until a toothpick comes out clean. Let cakes cool in the cake pans for about 10 minutes and finally invert the cakes onto a wire rack.
Directions for the Frosting
Begin heating the milk until hot, but not boiling in a small quart-sized saucepan. In a bowl, combine egg yolks, flour, and 1/3 cup confectioners sugar along with a pinch of salt. Pour milk into egg mixture and whisk continually. Put mixture back into the sauce pan and bring it to a low boil while continually whisking. Reduce the heat and continue whisking until the mixture becomes a thick custard. Transfer the mixture to a large mixing bowl and let cool for 45 minutes to an hour.
Once cooled, add vanilla and remaining amount of confectioners sugar and mix well. Beat in softened butter until smooth and creamy. Finally, pour in melted chocolate and beat the frosting until nice and airy.
Directions for Assembling the Cake
Using a serrated knife, cut each cake into two horizontal layers. Use about 1/2 cup to 3/4 cup of frosting between each layer and then use the remaining frosting for the top and sides of the cake.

The cake turned out very light, moist, and fluffy, yet extremely rich. We enjoyed a piece of cake along with some of our homemade mint liqueur. This is most definitely not your every day cake and would be perfect for a special occasion or surprise.

Needless to say, this must be the best chocolate cake that I've made to date, and would highly recommend trying it! Do you have any special dessert recipes that you'd like to share? I would love to try them!
The Best Granola Ever
Heidi Shenk "cuisine" "food" "recipe"
In a large bowl, mix:
6 cups rolled oats
1/2 cup brown sugar
3/4 cup oat bran
3/4 cup wheat germ
1 cup nuts (I always enjoy dry roasted peanuts)
1/2 cup sesame seeds

Spread the mixture evenly on two baking sheets and bake for 15 minutes at 375 degrees. Stir mixture while still on the baking sheet and bake for 5 more minutes and repeat. Total baking time is 25 minutes. After the granola is finished baking, let it cool on the baking sheets. I use a spoon to loosen the cooled granola and scoop it into a cereal container for storage.

Finally, eat the granola! Yum! Eat it with milk (that's what I like best!) or with yogurt as my mom often does.

And if you feel like checking out a few more of my mom's recipes, head over to her Facebook page, La Bonne Vie. She write a weekly column for my hometown paper and always includes a scrumptious recipe.